
Disclaimer: This post may contain affiliate links. If you make a purchase through them, we may earn a commission at no extra cost to you.
The Cookiebot Shopify app covers most stores, but not all of them. If you manage several domains from one Cookiebot account, deploy tags through Google Tag Manager, or need to decide exactly which scripts get blocked, you install Cookiebot manually in your theme code instead.
This guide walks you through the manual installation in 4 steps: the Customer Privacy API snippet, the Cookiebot script, prior consent markup for third-party scripts, and the cookie declaration. You will also see the one limitation of this method that no amount of code can fix.
Use Cookiebot CMP to collect user consent, stay compliant with GDPR and other global regulations, and ensure proper implementation of Consent Mode. Trusted by millions, available in 47+ languages, it’s the most popular solution for balancing privacy and performance. Easy to set up, fully customizable, and Google-certified.
![Get Started with Cookiebot Today With 15% Off for 6 Months [SPECIAL OFFER]](https://ppcnewsfeed.com/wp-content/uploads/2025/11/cookiebot-2025-11.jpg)
When the manual installation is the right choice
Pick the manual route when at least one of these is true:
- You deploy through Google Tag Manager: you want Cookiebot and Consent Mode loaded from GTM, alongside your other tags.
- You need script-level control: you decide which scripts are blocked and in which category, rather than relying on automatic blocking.
- You want one setup across platforms: the same approach works on your other sites.
If none of those apply, use the Cookiebot Shopify app. Cookiebot recommends it over the manual installation, because the App Embed framework handles script blocking automatically and needs no code.
🔧 Want the no-code route instead?
Here is how to set up Cookiebot on Shopify with the app in 4 steps.
The limitation you should know about first
Shopify adds its own native scripts to the page before any third-party script, including Cookiebot. By the time Cookiebot loads, some cookies or trackers may already be set, and you cannot mark up Shopify’s own scripts because you do not control them.
What you can do is signal consent to Shopify through the Customer Privacy API. Be clear about what that does: it does not block Shopify’s cookies before consent. It makes that tracking session based instead of persistent.
This is the main reason Cookiebot points merchants to the app, which handles blocking through Shopify’s App Embed framework. Choose the manual route with that trade-off in mind.
📔 Not sure what consent signals actually do?
Read Google Consent Mode explained for what each signal means and why Google requires them.
The step by step guide
Step 1: Copy your CBID and open the code editor
Log into the Cookiebot Manager, open the Your scripts tab, and copy the serial number (CBID) of the domain group your Shopify domain belongs to. It looks like 00000000-0000-0000-0000-000000000000.
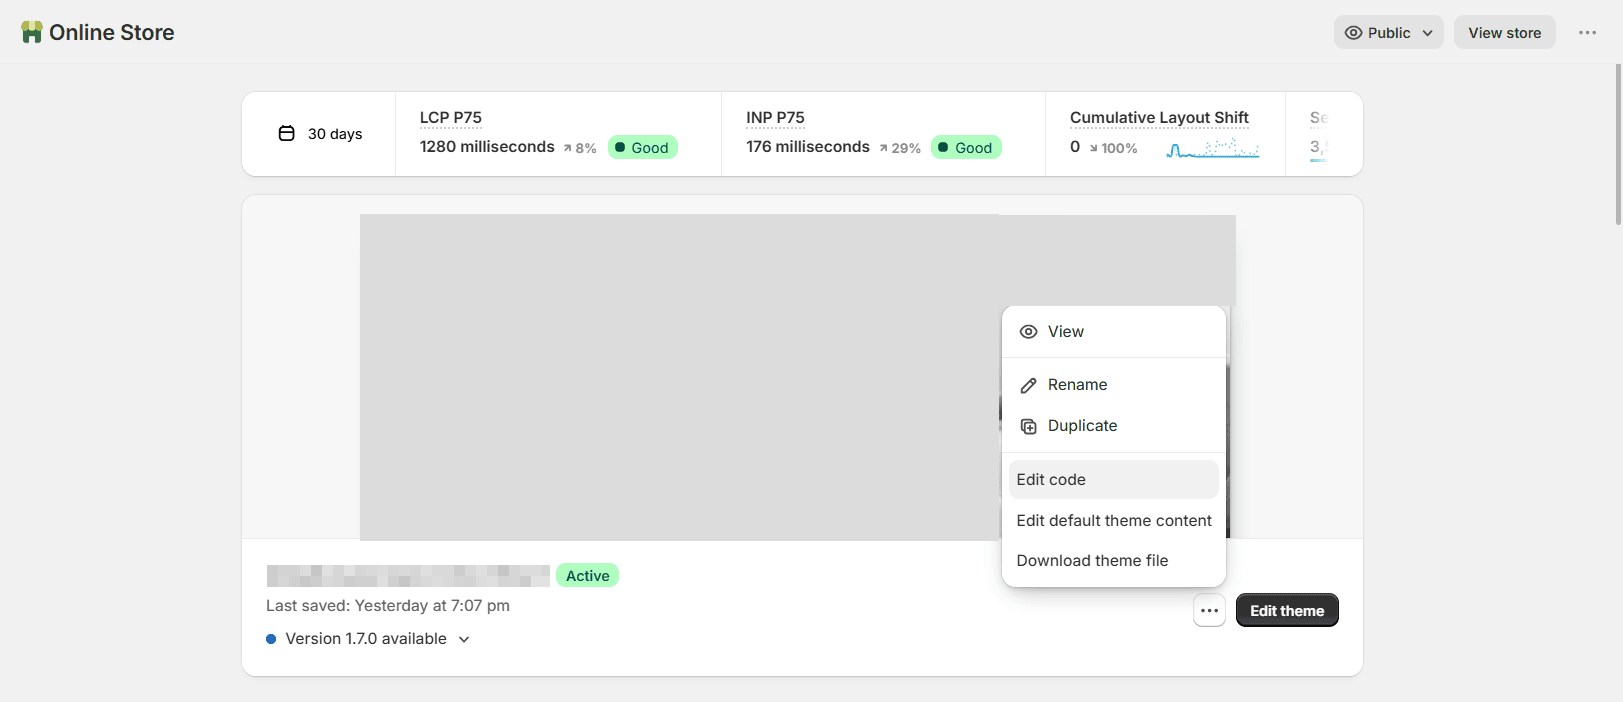
Then open the theme code editor:
- Go to Online Store, then Themes.
- Click Customize.
- Click the ••• button.
- Select Edit code.
Duplicate your theme before you change anything, so you have a clean rollback.
Step 2: Create the Customer Privacy API snippet
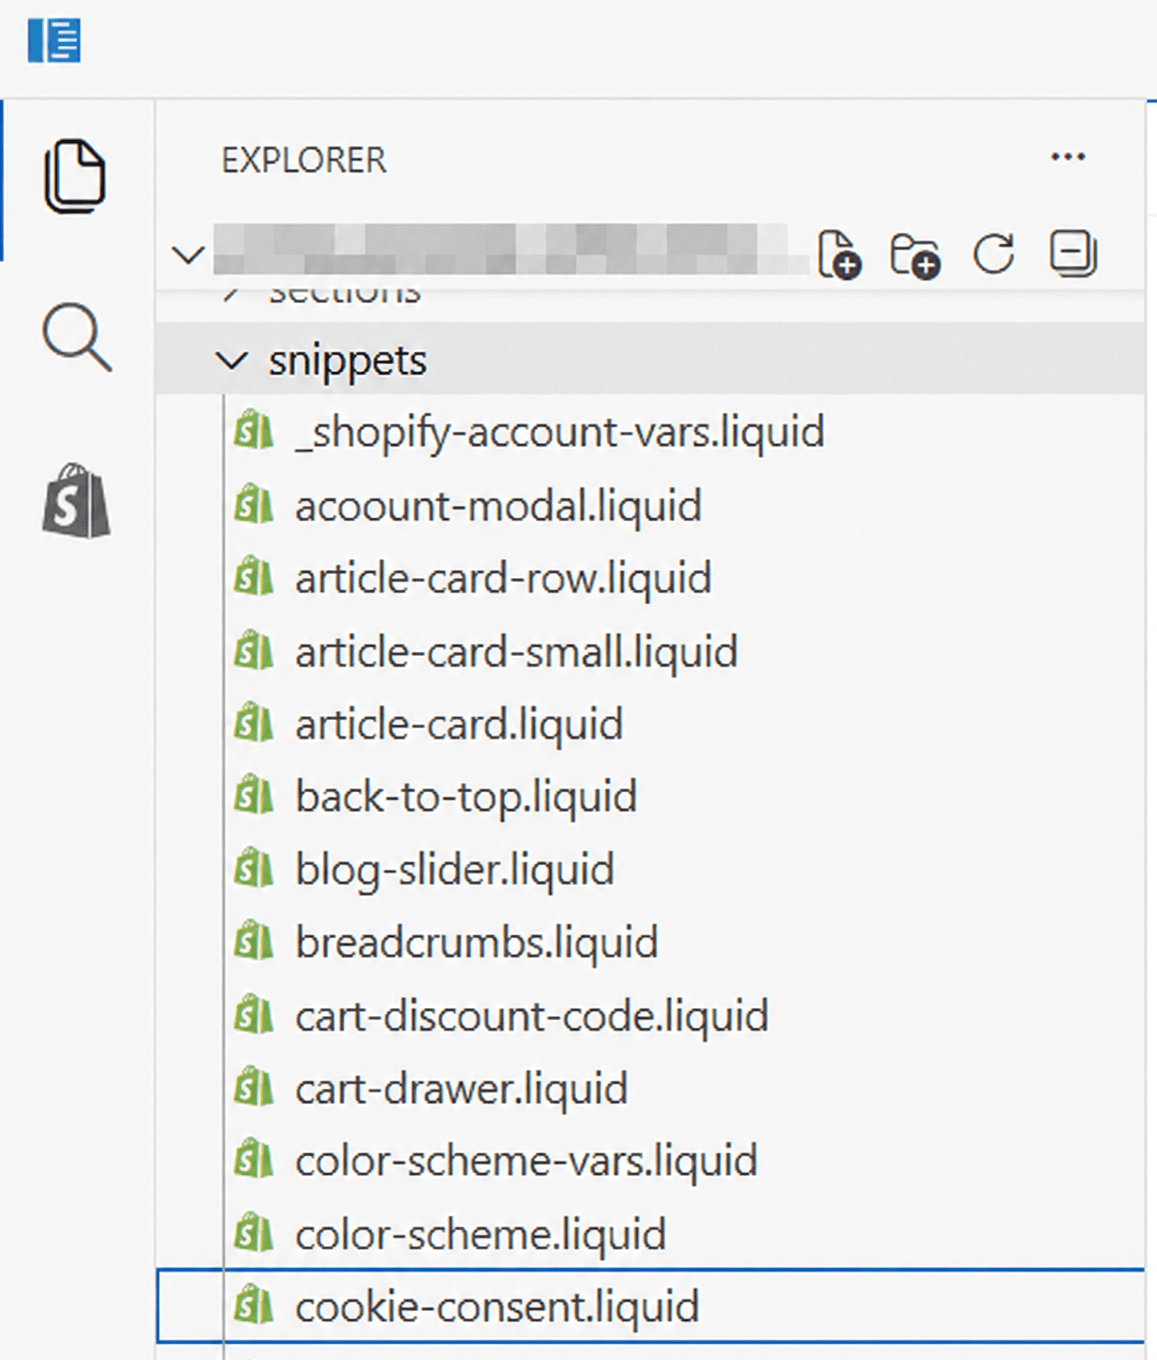
Under Snippets, click Add a new snippet, name it cookie-consent, and confirm with Create snippet. Paste this into cookie-consent.liquid:
<script>
function feedback() {
  const p = window.Shopify.customerPrivacy;
  console.log(`Tracking ${p.userCanBeTracked() ? "en" : "dis"}abled`);
}
window.Shopify.loadFeatures(
  [{ name: "consent-tracking-api", version: "0.1" }],
  function (error) {
    if (error) throw error;
    if ("Cookiebot" in window)
      window.Shopify.customerPrivacy.setTrackingConsent({
        "analytics": false,
        "marketing": false,
        "preferences": false,
        "sale_of_data": false,
      }, () => console.log("Awaiting consent"));
  }
);
window.addEventListener("CookiebotOnConsentReady", function () {
  const C = Cookiebot.consent,
    existConsentShopify = setInterval(function () {
      if (window.Shopify.customerPrivacy) {
        clearInterval(existConsentShopify);
        window.Shopify.customerPrivacy.setTrackingConsent({
          "analytics": C["statistics"],
          "marketing": C["marketing"],
          "preferences": C["preferences"],
          "sale_of_data": C["marketing"],
        }, () => console.log("Consent captured"));
      }
    }, 100);
});
</script>
Click Save.
The script sets every consent type to false on load, then listens for CookiebotOnConsentReady and passes the visitor’s actual choices to Shopify. Note that Cookiebot’s statistics category maps to Shopify’s analytics, and marketing maps to both marketing and sale_of_data.
Open theme.liquid and insert this directly under the <head> tag, so the banner loads as early as possible:
<script
  id="Cookiebot"
  src="https://consent.cookiebot.com/uc.js"
  data-cbid="00000000-0000-0000-0000-000000000000"
  type="text/javascript"
  defer
></script>
Replace the zeroes with your CBID. Then find this line:
{{ content_for_header }}And add this directly under it:
{% render 'cookie-consent' %}Click Save.
Loading Cookiebot through Google Tag Manager instead? Skip the script tag above, keep the snippet, and add your Consent Mode script right above the Cookiebot script in GTM.
⚙️ Running everything through GTM?
Follow how to implement Cookiebot with Google Tag Manager in 5 steps, then come back for the snippet in Step 2.
Step 4: Mark up third-party scripts for prior consent
Cookiebot only blocks what you tell it to block. To enable prior consent, you apply the markup below to every script tag that sets cookies.
For every script that sets cookies:
- Change
type="text/javascript"totype="text/plain". - Add a
data-cookieconsentattribute with the matching category, usingpreferences,statistics,marketing, or a comma-separated combination.
A Google Analytics tag becomes:
<script type="text/plain" data-cookieconsent="statistics">
  // your analytics code
</script>
Set the value in accordance with the types of cookies each script actually sets. The category you pick is what decides whether that script runs before consent.
Apps you install can set cookies too, and you cannot mark those up without breaking them. Where possible, load third-party tags through a tag manager and gate them on consent there instead of pasting them into the theme.
🕵️ Want to see what is still firing?
Here are 5 steps to check your website cookies, with screenshots.
The cookie declaration is the auto-updating list of every cookie your store uses. It belongs in your privacy policy.
- Go to Sales channels, then Pages, and open your privacy policy, or click Add page.
- Type a placeholder such as
#THIS IS THE PLACE#where the declaration should appear. - Click the <> button to show the HTML source.
- Replace the placeholder with the script below, using your own CBID, then click Save.
<script
  id="CookieDeclaration"
  src="https://consent.cookiebot.com/00000000-0000-0000-0000-000000000000/cd.js"
  type="text/javascript"
  async
></script>
Verify the installation
Open your store in an incognito window and run these four checks:
- Banner loads first: the Cookiebot banner appears before any marked-up script runs.
- Decline blocks tags: open the console, decline everything, and confirm your analytics and ads tags never execute.
- Consent reaches Shopify: the console logs
Consent captured, which means the Customer Privacy API received your choice. - Declaration renders: your privacy policy page shows a populated cookie list.
If a tag still fires after you decline, it is not marked up. Find it in the theme or in your tag manager and fix the markup there.
🔍 Need more ways to confirm the signals?
Try these 9 ways to check if Consent Mode is enabled.
Ship a compliant Shopify store
The manual installation takes longer than the app and gives you exactly what the app cannot: control over which scripts fire, one central Cookiebot account, and a setup that fits the tag manager you already use. The trade-off is Shopify’s own scripts, which you can only make session based, not block.
Copy your CBID, add the snippet, mark up your scripts, and run the four checks above to get Cookiebot working on your store.
Use Cookiebot CMP to collect user consent, stay compliant with GDPR and other global regulations, and ensure proper implementation of Consent Mode. Trusted by millions, available in 47+ languages, it’s the most popular solution for balancing privacy and performance. Easy to set up, fully customizable, and Google-certified.

Hana Kobzová is a freelance PPC specialist and the founder of PPC News Feed. Named among the TOP 100 Most Influential PPC Experts 2026, she is also a Google Ads Product Expert and a Microsoft Advertising Certified Professional. Hana delivers clear updates and actionable insights that help marketers save time and work smarter.