Disclaimer: This post may contain affiliate links. If you make a purchase through them, we may earn a commission at no extra cost to you.
Welcome to the ultimate guide to setting up Cookiebot CMP on your WordPress website. This guide will walk you through everything from installation to customization while keeping things easy and stress-free.
Before we begin the installation process, it’s important to first understand the primary components involved in implementing Cookiebot on WordPress.
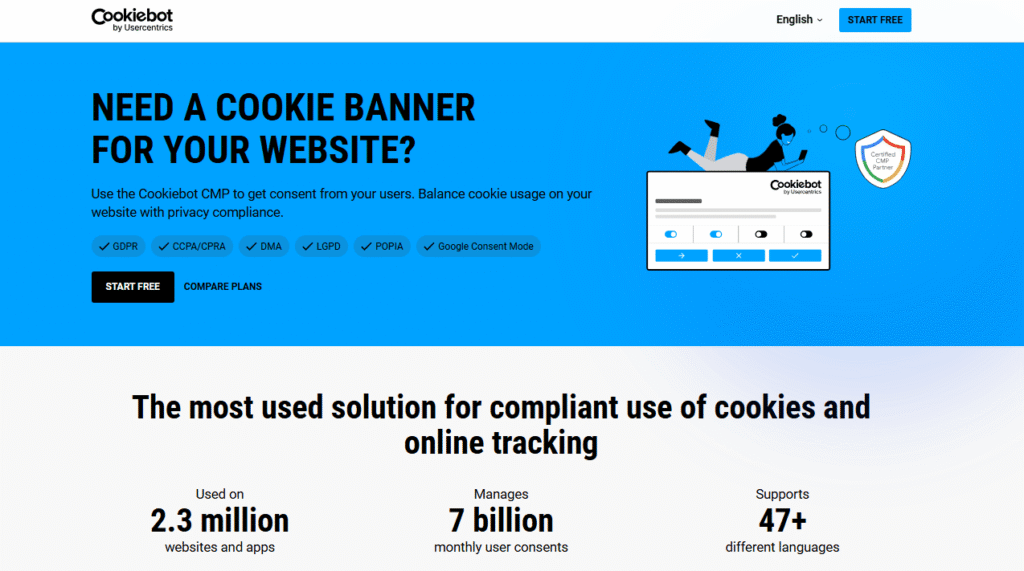
Cookiebot: Google-certified Consent Management Platform (CMP) that automates consent compliance on your website. It scans, monitors, and controls all cookies and trackers to ensure transparency and compliance with regulations like GDPR, CCPA and others.
Use Cookiebot CMP to collect user consent, stay compliant with GDPR and other global regulations, and ensure proper implementation of Consent Mode. Trusted by millions, available in 47+ languages, it’s the most popular solution for balancing privacy and performance. Easy to set up, fully customizable, and Google-certified.
![Get Started with Cookiebot Today With 15% Off for 6 Months [SPECIAL OFFER]](https://ppcnewsfeed.com/wp-content/uploads/2025/11/cookiebot-2025-11.jpg)
WordPress: Very popular Content Management System (CMS) used to build and manage websites. To implement Cookiebot, you’ll need admin access to your WordPress site with the ability to install and manage plugins.
Consent Mode: A privacy-focused feature that adjusts how tags behave based on user consent. Instead of blocking all tags by default, it gives you control over data collection and sends only limited or no data until the user gives permission.

📘 Curious to learn more? Explore the inner workings of Consent Mode and discover how it manages user consent behind the scenes.
Besides avoiding hefty fines for non-compliance, here are some cool reasons why Cookiebot is the ideal consent solution for WordPress:
✔️ Seamless Integration – Quick and simple setup in just minutes (see steps below)
✔️ Automatic Cookie Scanning – Detects all cookies and trackers on your site
✔️ Global Ready – Supports multilingual sites and various privacy regulations
✔️ Customizable Consent Banner – Matches your brand’s design & style
✔️ User-Friendly – No coding skills required
Use Cookiebot CMP to collect user consent, stay compliant with GDPR and other global regulations, and ensure proper implementation of Consent Mode. Trusted by millions, available in 47+ languages, it’s the most popular solution for balancing privacy and performance. Easy to set up, fully customizable, and Google-certified.
Now, let’s get Cookiebot up and running on your WordPress site.
Ready to start? Follow these 5 steps to integrate Cookiebot with your WordPress:
- Step 1: Create and Set Up Your Cookiebot Account
- Step 2: Install and Activate the Cookiebot Plugin
- Step 3: Configure the Cookiebot WordPress Plugin
- Sign Up – Visit Cookiebot and create an account. A 14-day free trial is available to get you started.
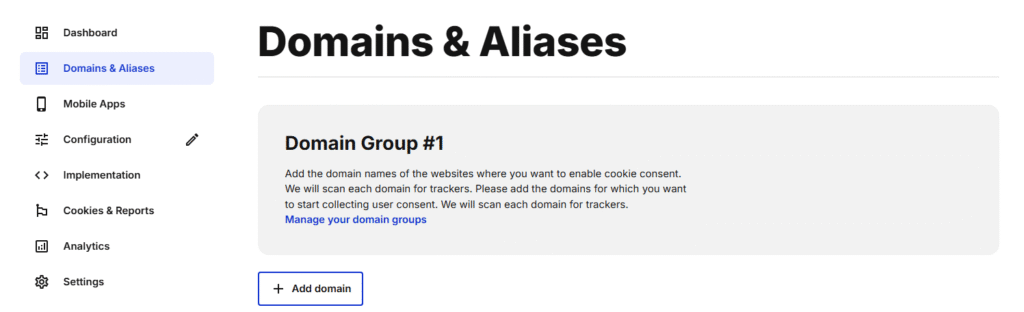
- Add Your Website – In the “Domains” section, click “Add domain” and enter your website’s URL.
- Customize Your Consent Banner – Head to the Configuration tab in Cookiebot’s admin panel to customize your cookie consent banner. You can tailor its design and functionality to suit your site’s branding and meet regional privacy regulations.
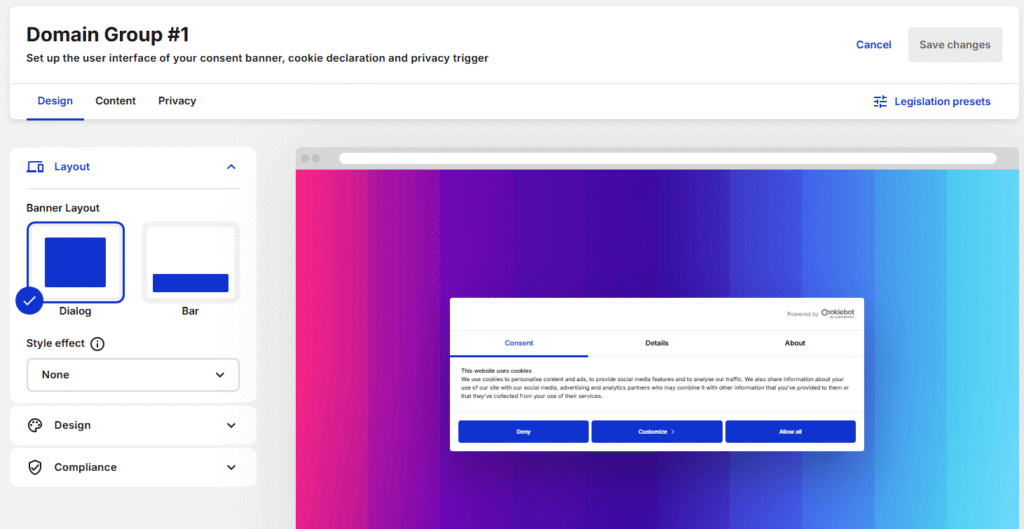
🎨 Not sure if your cookie banner is fully compliant? Check out these 13 essential consent banner requirements, complete with real-world examples.
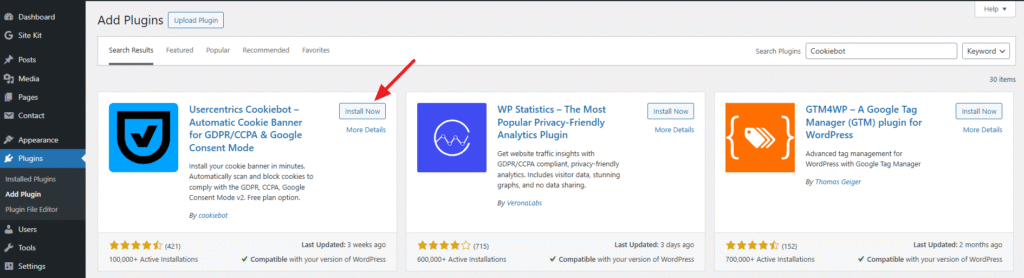
- Go to Your WordPress Dashboard and navigate to Plugins > Add Plugin.
- Search for “Cookiebot” in the plugin directory.
- Click “Install Now” and then “Activate” the plugin.
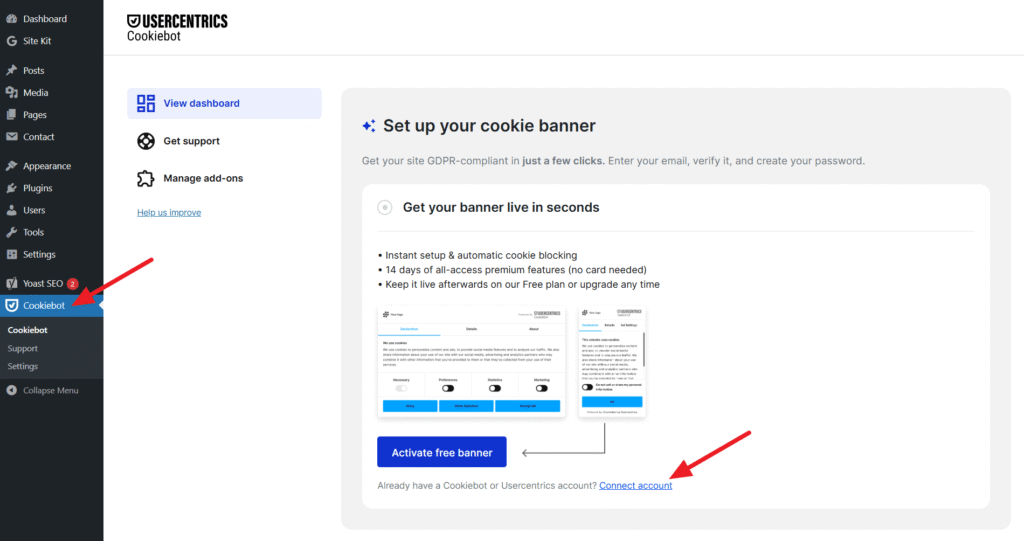
- Connect Your Cookiebot account
- Click on “Cookiebot” in the WordPress sidebar
- Click on “Connect account“
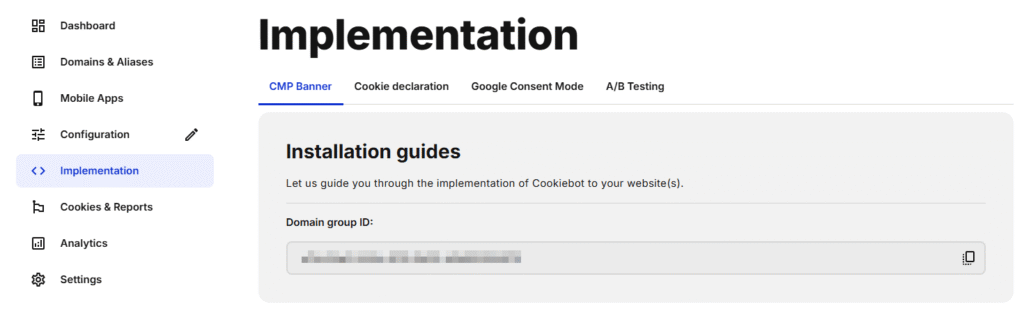
- Retrieve Your Domain Group ID
- In your Cookiebot admin, find your Domain Group ID under the Implementation section and scroll down to Installation guides.
- Copy your Domain Group ID (a unique alphanumeric code).
- Connect Your Cookiebot account
- Paste it in the Cookiebot plugin on WordPress and click “Connect account“.
Please wait while the connection is established. Once complete, the plugin’s configuration options will become available.
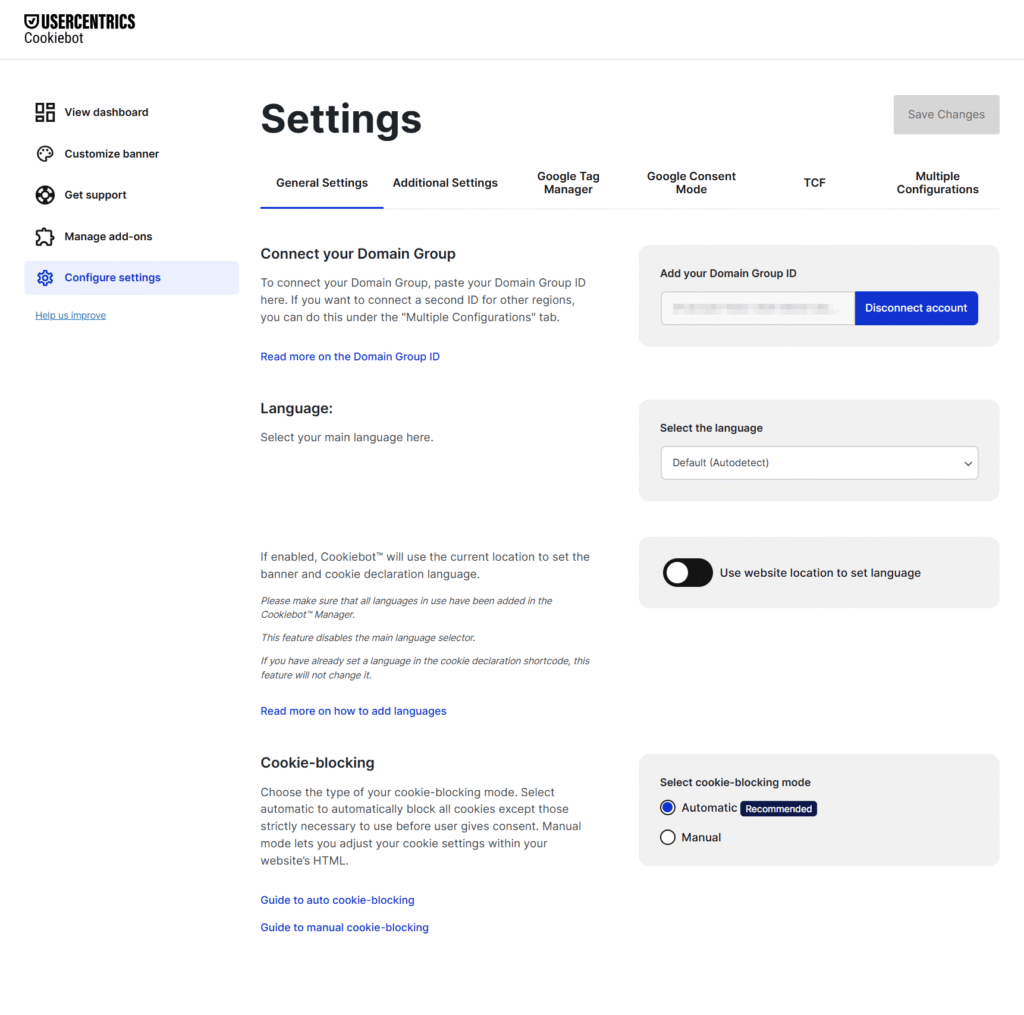
Review the settings, but Cookiebot is now connected and active on your site. The consent banner will display automatically.
Easy, right? It took only three easy steps and no coding.
Use Cookiebot CMP to collect user consent, stay compliant with GDPR and other global regulations, and ensure proper implementation of Consent Mode. Trusted by millions, available in 47+ languages, it’s the most popular solution for balancing privacy and performance. Easy to set up, fully customizable, and Google-certified.
Optional Advanced Configurations
Connecting Google Tag Manager
If you use Google Tag Manager (GTM) for tracking and analytics, you can sync it with Cookiebot for better cookie management:
- Go to your GTM Account and copy your GTM Container ID (looks like GTM-XXXXXX).
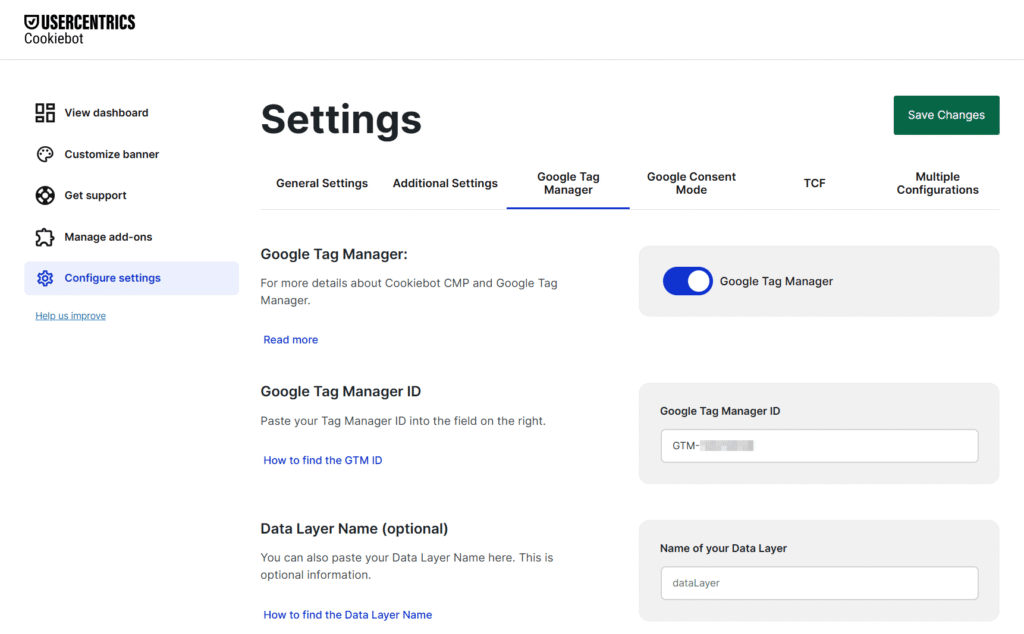
- In WordPress, go to Cookiebot > Settings > Google Tag Manager.
- Enable GTM integration and paste your GTM Container ID.
- Click Save.
🔧 Using Google Tag Manager? Learn how to set up Cookiebot in Google Tag Manager in just 5 easy steps.
Implementing Google Consent Mode
Google Consent Mode adjusts how Google services (like Google Analytics and Google Ads) behave based on user consent.
📘 Want a deeper understanding of how Google Consent Mode actually works?
Explore our complete guide to Consent Mode for everything you need to know.
Here’s how to enable Google Consent Mode in Cookiebot:
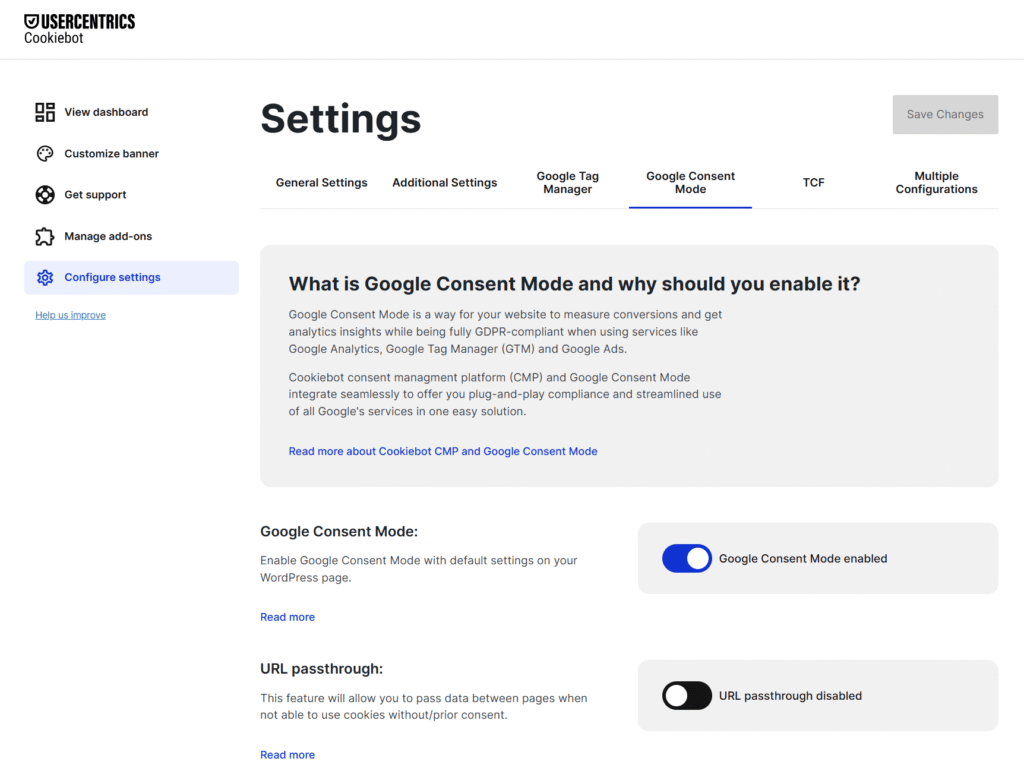
- In Cookiebot, go to Settings > Google Consent Mode.
- Enable Consent Mode to allow Google tools to respect user choices.
- Save your settings – Now Google will only track when users give consent
This ensures compliance with privacy laws while maintaining valuable insights.
🛠️ Want to be sure it’s working? Discover 9 ways to verify Consent Mode is enabled.
Conclusion
And there you have it! You’ve successfully set up Cookiebot on your WordPress site like a pro.
Now, sit back, relax, and enjoy a fully privacy-compliant WordPress website.
Use Cookiebot CMP to collect user consent, stay compliant with GDPR and other global regulations, and ensure proper implementation of Consent Mode. Trusted by millions, available in 47+ languages, it’s the most popular solution for balancing privacy and performance. Easy to set up, fully customizable, and Google-certified.
Hana Kobzová is a freelance PPC specialist and the founder of PPC News Feed. Named among the TOP 100 Most Influential PPC Experts 2026, she is also a Google Ads Product Expert and a Microsoft Advertising Certified Professional. Hana delivers clear updates and actionable insights that help marketers save time and work smarter.